
Engine performance is crucial for any Mustang owner, and spark plugs play a vital role in ensuring that your vehicle runs smoothly. Over time, spark plugs can wear out, leading to decreased engine efficiency, reduced power, and even starting issues. That’s why changing the spark plugs is a necessary maintenance task every Mustang enthusiast should master.
In this comprehensive guide, we will walk you through each step of the process to change the spark plugs in your Mustang. Whether you own a classic model or a newer generation, our step-by-step approach will empower you to take control of your engine’s health. By following these instructions, you’ll not only save money on labor costs but also gain a deeper understanding of your vehicle’s inner workings.
Get ready to enhance your Mustang’s performance and reliability. With the right tools and our detailed guidance, you’ll find that changing spark plugs is an accessible DIY task. So, let’s dive in and get your engine running at its best once again!
Identifying the Right Spark Plugs for Your Mustang Model

Choosing the correct spark plugs is crucial for maintaining the performance of your Mustang. Different models and engine types require specific plugs to operate efficiently. Start by consulting your vehicle’s owner manual, which provides the manufacturer’s specifications for the recommended spark plugs.
Next, identify your Mustang’s engine type and year. For instance, the 5.0L V8 engine may need different plugs compared to the EcoBoost 2.3L turbocharged engine. The spark plugs for these engines vary in terms of heat range, thread size, and gap measurements, which significantly affect performance.
Consider the material of the spark plugs as well. Copper, platinum, and iridium spark plugs each provide different benefits. Copper plugs generally offer better conductivity but have a shorter lifespan, while platinum and iridium plugs provide improved durability and performance over time. Select the type that aligns with your driving habits and maintenance preferences.
Also, pay attention to the gap setting of the spark plugs. This gap influences spark strength and combustion efficiency. Using a gap tool can help ensure that you are installing plugs with the correct gap for your specific engine.
Finally, it is advisable to choose plugs from reputable manufacturers to ensure quality and performance. Brands like Ford, NGK, and Bosch offer reliable options tailored for Mustang models. Investing in the right spark plugs will enhance your vehicle’s performance, fuel efficiency, and overall reliability.
Tools and Equipment Needed for Spark Plug Replacement
Replacing the spark plugs in your Mustang requires several essential tools and equipment to ensure the job is done correctly and efficiently. Here’s a list of what you will need:
1. Socket Set: A socket set is crucial for removing and installing the spark plugs. Typically, a 5/8-inch or 13/16-inch spark plug socket will be needed, depending on the specific engine model.
2. Ratchet and Extension: A ratchet handle, along with an extension, will help you reach deeper plugs, especially in cramped engine compartments.
3. Torque Wrench: It is important to use a torque wrench to tighten the new spark plugs to the manufacturer’s specifications. This prevents damage to the engine and ensures optimal performance.
4. Spark Plug Gap Tool: This tool is necessary for checking and adjusting the gap on each spark plug before installation. A properly gapped plug is essential for effective engine operation.
5. Pliers: Needle-nose pliers can be useful for removing any stubborn ignition wires or reach components in the engine bay.
6. Anti-Seize Compound: Applying a small amount of anti-seize compound to the threads of the new spark plugs can prevent them from seizing in the engine over time.
7. Compressed Air: Using compressed air to blow out any debris or dirt from around the spark plug holes before removal is a good practice to prevent contaminants from entering the engine.
8. Safety Glasses and Gloves: Always wear safety glasses and gloves to protect your eyes and hands while working. This ensures safety during the replacement process.
Having these tools and equipment ready will make the spark plug replacement process smoother and more efficient, resulting in better engine performance for your Mustang.
Step-by-Step Process for Removing and Installing Spark Plugs

Changing the spark plugs in your Mustang is a vital maintenance task that can improve engine performance and efficiency. Follow this step-by-step guide to remove and install spark plugs correctly.
Step 1: Gather Your Tools
Before starting, make sure you have the necessary tools: a spark plug socket, ratchet wrench, extension bar, torque wrench, and a gap gauge. You may also need anti-seize lubricant and dielectric grease.
Step 2: Prepare the Engine
Ensure that the engine is cool. Disconnect the negative battery terminal to prevent any electrical issues. This step is crucial for safety when working on the engine.
Step 3: Locate the Spark Plugs
The spark plugs are usually located on the cylinder head. Depending on your Mustang model, you may need to remove components like the engine cover or air intake to access them easily.
Step 4: Remove the Ignition Coil or Spark Plug Wires
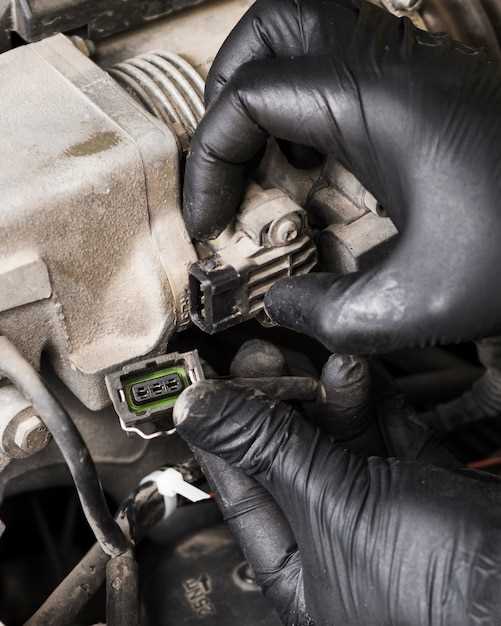
If your Mustang has ignition coils, detach them by removing the bolts or clips. For spark plug wires, carefully pull them off the plugs, taking note of their order for reinstallation. Use a twisting motion to avoid damage.
Step 5: Remove the Old Spark Plugs
Using the spark plug socket, attach the ratchet and carefully turn the plugs counterclockwise to loosen them. Once they’re loose, remove them by hand. Inspect each old spark plug for wear or damage.
Step 6: Prepare New Spark Plugs
Before installation, check the gap of the new spark plugs using a gap gauge. Adjust if necessary. Apply a small amount of anti-seize lubricant to the threads to prevent seizing.
Step 7: Install the New Spark Plugs
Insert each new spark plug into the socket and thread it into the engine by hand to avoid cross-threading. Tighten it with the ratchet, then use a torque wrench to ensure it is tightened to the manufacturer’s specifications.
Step 8: Reattach Ignition Coils or Spark Plug Wires
Reinstall the ignition coils or spark plug wires in the correct order, ensuring that they are securely attached to the new plugs. This step helps maintain optimal engine performance.
Step 9: Reconnect the Battery
Once all spark plugs are installed and secured, reconnect the negative battery terminal. This restores power to the engine.
Step 10: Startup and Test
Start the engine to ensure that everything is functioning correctly. Listen for any unusual sounds and monitor the performance. If everything runs smoothly, you have successfully changed the spark plugs.


