

Rebuilding a Mustang engine is not just a mechanical task; it’s a journey into the heart of automotive performance and passion. For many enthusiasts, breathing new life into a classic Mustang can be a fulfilling project that combines skill, knowledge, and dedication. This step-by-step guide will walk you through the entire process of an engine rebuild, ensuring that every component is meticulously cared for and restored to its former glory.
Before diving into the details, it’s important to understand the significance of the engine rebuild. A well-executed rebuild can enhance your Mustang’s performance, increase reliability, and deliver a driving experience that newer models simply can’t replicate. From assessing the condition of your engine to selecting the right parts and tools, this guide provides the critical information needed for a successful rebuild.
Throughout this guide, we will cover essential topics such as disassembly, inspection of components, sourcing high-quality replacement parts, and reassembly techniques. Whether you’re an experienced mechanic or a novice looking to explore the world of automotive restoration, this guide will equip you with the knowledge needed to embark on your Mustang engine rebuild with confidence.
Gathering Necessary Tools for Your Mustang Engine Rebuild
Rebuilding an engine requires specific tools to ensure the process is efficient and effective. The first essential tool is a complete set of hand tools, including sockets, wrenches, pliers, and screwdrivers. These will help you remove and install various components easily.
A torque wrench is crucial for ensuring that bolts are tightened to the manufacturer’s specifications. This tool helps prevent damage to engine parts due to over-tightening or under-tightening.
An engine hoist or engine crane is necessary for extracting the engine from the Mustang. This equipment allows for safe and controlled lifting, which is vital for preventing injuries as well as damage to the vehicle.
You will also need an engine stand. This tool is designed for holding the engine securely while you work on it, providing easy access to all sides of the engine for repairs and reassembly.
A comprehensive engine rebuild kit is essential, containing gaskets, seals, and other components necessary for a successful rebuild. It is important to select a high-quality kit specifically designed for your Mustang model.
Additionally, a good quality oil pump, water pump, and timing chain set are often required for an engine rebuild. These components are critical for the engine’s performance and longevity.
Don’t forget to gather measuring tools like calipers and micrometers. These will help you check tolerances and measurements, ensuring that all parts fit together perfectly when you reassemble the engine.
Finally, consider investing in a parts cleaner or solvent tank to keep your components free of dirt and debris. Clean parts improve the engine’s performance and reliability.
Disassembling the Engine: Techniques and Tips
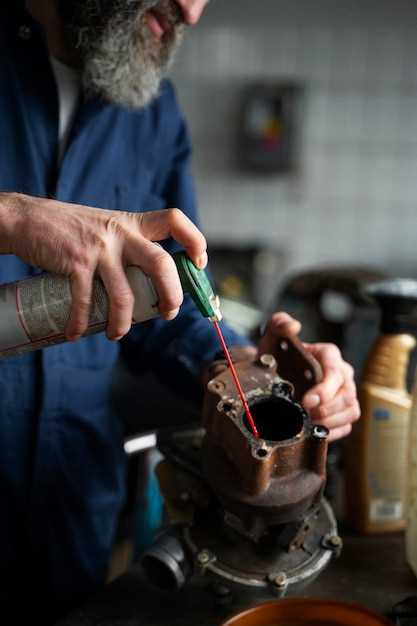
Disassembling the engine of a Mustang is a crucial step in the rebuilding process. It requires precision, patience, and the right tools to ensure that each component is removed safely and effectively. Here are some techniques and tips to help you successfully disassemble your Mustang engine.
Before starting the disassembly, gather the necessary tools:
- Socket set with various sizes
- Torque wrench
- Screwdrivers (flat and Phillips)
- Pliers
- Engine hoist or crane
- Magnetic trays for small parts
- Labeling materials (tape and markers)
Follow these steps for an effective disassembly:
-
Preparation:
- Disconnect the battery and remove it from the vehicle.
- Drain all fluids, including oil, coolant, and fuel, to avoid spills.
-
Remove Engine Accessories:
- Detach the air intake system, exhaust manifolds, and any other mounted accessories.
- Keep track of bolts and small parts by placing them in labeled containers.
-
Detach the Engine from the Vehicle:
- Carefully secure the engine with an engine hoist.
- Unbolt the engine mounts and any additional supports holding the engine in place.
-
Disassemble the Engine Components:
- Start with the valve covers, followed by the timing cover and chain.
- Proceed to remove the cylinder heads, ensuring that you follow the correct order for bolt removal to avoid warping.
- Continue with the intake manifold, carburetor, and ignition components.
- Finally, remove the oil pan and crankshaft assembly.
-
Inspect and Clean:
- As you disassemble each component, inspect for wear and damage.
- Clean parts thoroughly before reassembly using appropriate solvents.
Utilizing proper techniques and tools will aid in a smoother disassembly process. Keep organized, document every step, and ensure that each part is in good condition for reassembly. Your Mustang engine rebuild will benefit greatly from a meticulous disassembly phase.
Reassembling the Mustang Engine: Key Steps to Follow

When it comes to reassembling your Mustang engine after a rebuild, precision and attention to detail are essential. A methodical approach not only ensures optimal engine performance but also extends the lifespan of your vehicle. Below are key steps to consider during the reassembly process.
1. Prepare Your Workspace
Before you begin, set up a clean and organized workspace. Gather all necessary tools, including torque wrenches, sockets, and screwdrivers. Make sure you have labeled containers for small parts to avoid confusion later.
2. Check All Components
Inspect each engine component for wear and damage. Look for cracks in the block, worn bearings, and the condition of gaskets. Replace any subpar parts to ensure a reliable engine after the rebuild.
3. Assemble the Bottom End
Start with the crankshaft, connecting rods, and pistons. Apply assembly lube to all moving parts to reduce friction during initial startup. Carefully insert the pistons into the cylinder bores, ensuring they are oriented correctly.
4. Install the Timing Chain and Camshaft
Once the bottom end is secured, install the timing chain and camshaft. Set the timing marks appropriately to ensure proper synchronization between the crankshaft and camshaft. This step is crucial for effective engine performance.
5. Attach the Cylinder Heads
Position the cylinder heads onto the engine block, ensuring that the head gaskets are correctly aligned. Use a torque wrench to tighten the head bolts in the manufacturer’s specified sequence and to the recommended torque specifications.
6. Install Intake and Exhaust Manifolds
After securing the heads, attach the intake and exhaust manifolds. Again, use new gaskets to prevent leaks. Proper alignment is vital, as this will impact overall engine efficiency.
7. Connect Accessories
Now it’s time to connect various accessories such as the oil pump, water pump, and alternator. Make sure wiring harnesses and hoses are routed neatly and securely attached to avoid any possible interference.
8. Double-Check Everything
Before final assembly, go over each step to ensure that all bolts are tightened to the correct specifications and that every component is installed as intended. This thorough check will save you from potential headaches later.
9. Fill Fluids and Prime the Engine
With the engine fully reassembled, add oil, coolant, and other necessary fluids. It’s advisable to manually prime the engine to ensure that oil circulates before the first startup. This step protects critical components from damage.
10. Final Startup and Test
Finally, crank the engine and monitor for any unusual sounds or leaks. If everything checks out, take your Mustang for a test drive to ensure it operates smoothly and reliably. This is the moment you’ve been building towards, so enjoy the fruits of your labor.
Following these key steps carefully will help ensure a successful Mustang engine rebuild that performs optimally. Utilize your tools effectively and approach each step methodically for the best results.


