
Restoring a classic car, particularly a Ford Mustang, is a rewarding and fulfilling endeavor that combines a passion for automotive history with hands-on mechanical skills. A restoration project offers the opportunity to breathe new life into a vehicle that holds nostalgic value and represents an iconic piece of American automotive culture. In this guide, you will learn the essential steps to embark on your classic Mustang restoration journey.
Before diving into the details, it is crucial to understand the importance of planning. A successful restoration requires a clear vision and a thorough assessment of the car’s current condition. This means evaluating not just the bodywork, but also the engine, interior, and other critical components. Starting with a well-thought-out plan can save you time and resources as you navigate the challenges that come with restoration.
In addition to planning, acquiring the right tools and materials is essential. Restoring a classic Mustang can involve everything from minor repairs to complete overhauls, so having a well-equipped workshop is vital. Invest in quality tools and supplies that will ensure your work is both efficient and effective. Understanding the different stages of restoration will also help you prioritize tasks and allocate your budget correctly.
Join us as we explore the major steps involved in a classic Mustang restoration project, offering insights and tips to help you achieve a stunning final product that not only performs well but also embodies the spirit of the original design.
Creating a Comprehensive Restoration Plan and Budget

When embarking on a classic Mustang restoration project, a well-thought-out restoration plan and budget are essential to ensure a successful outcome. Start by defining the scope of your project. Determine whether you aim for a complete restoration or a partial refurbishing. This decision will greatly influence the materials, labor, and time required.
Next, compile a detailed inventory of your car’s current condition. Assess each component, from the engine and transmission to the body and interior. Document necessary repairs and upgrades, prioritizing safety and functionality while considering desired aesthetics. This inventory will serve as a foundation for your restoration plan.
Once you have a clear understanding of what needs to be done, outline a timeline for the project. Break down the restoration process into manageable phases, such as disassembly, repairs, repainting, and reassembly. Assign realistic timeframes for each phase, considering your skill level and availability.
Creating a budget is one of the most crucial aspects of your restoration project. Start by estimating the cost of parts, tools, and labor. Research prices from various suppliers, and consider joining online forums or local clubs for insights on where to find quality components at reasonable prices. Keep in mind that unexpected expenses often arise, so allocate extra funds–typically 10-20% of your total budget–as a contingency.
Document all your findings and financial estimates in a spreadsheet for transparency and easier tracking. Regularly update this document as you make purchases or encounter unforeseen issues. Sticking to a budget can be challenging but remains critical to the success of your restoration project.
Lastly, be prepared for some flexibility in both your plan and budget. Restorations can unveil hidden problems that may require additional time and funds. Maintain a positive attitude and adapt your approach as necessary to overcome challenges while ensuring that your classic Mustang restoration remains enjoyable and rewarding.
Selecting the Right Tools and Parts for Your Restoration

Embarking on a classic Mustang restoration project requires careful consideration of both tools and parts. Utilizing the right equipment not only enhances efficiency but also ensures that the restoration process proceeds smoothly.
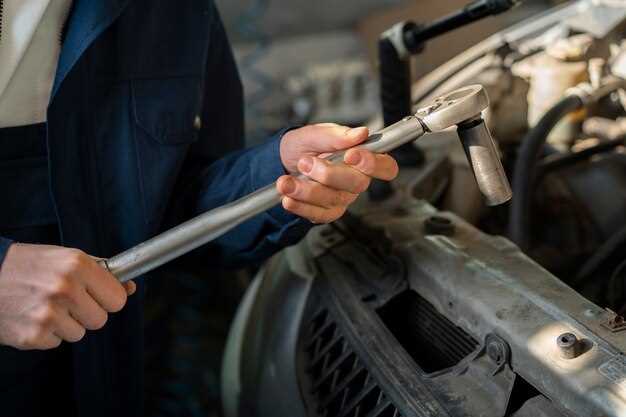
First, invest in high-quality hand tools. Essential tools for working on your classic Mustang include wrenches, sockets, screwdrivers, pliers, and hammer sets. Having a complete set allows you to tackle various tasks without interruptions. Additionally, consider procuring specialty tools such as torque wrenches for precise fittings and alignment tools for ensuring proper suspension geometry.
Power tools can significantly speed up your restoration. A reliable drill, angle grinder, and impact wrench will facilitate tasks like removing rust, drilling holes, and bolting components into place. It’s also wise to have a good-quality sander and buffer for restoring body panels to their original shine.
When it comes to parts, sourcing original or good-quality aftermarket components is crucial. The integrity of your classic Mustang hinges on the quality of its parts. Use restoration catalogs, online forums, and reputable parts suppliers to find the specific components needed for your project. Look for parts that match your car’s production year, as this ensures compatibility and maintains authenticity.
Additionally, consider investing in replacement panels and rust repair sections if your Mustang shows signs of deterioration. These parts often require precise fitting, so having the right tools to measure and adapt is essential. Furthermore, pay attention to wiring, brakes, and engine components, as these elements directly affect the performance and safety of your classic car.
In summary, selecting the right tools and parts is pivotal for a successful restoration of your classic Mustang. By equipping yourself with quality tools and sourcing reliable components, you pave the way for a rewarding automotive project that honors the legacy of the Mustang.
Step-by-Step Guide to Bodywork and Paint Application
Restoring the body of your classic car is a crucial aspect of the overall restoration project. The following steps will guide you through the bodywork and paint application process effectively.
1. Assessment: Start by examining the car’s body for rust, dents, and other imperfections. Identify areas that require repair or replacement. Make a list of materials needed, including fillers, sandpaper, and primers.
2. Rust Removal: Address rust issues first. Use a wire brush or sandpaper to remove rust from affected areas. For severe cases, cutting out the rusted section and welding in new metal may be necessary.
3. Dent Repair: For minor dents, use a body filler to smooth the surface. Mix the filler according to the manufacturer’s instructions and apply it over the dent. Once dry, sand it down to create an even surface.
4. Surface Preparation: Thoroughly clean the entire surface to remove dirt, grease, and old paint. Use a degreaser followed by soap and water. After cleaning, sand the entire area until the surface is rough enough for primer to adhere.
5. Priming: Apply a high-quality primer. This step is essential for preventing rust and ensuring that the paint adheres properly. Use a spray gun for even application, and allow the primer to dry completely before proceeding.
6. Sanding Primer: Once the primer is dry, sand it with fine-grit sandpaper to create a smooth surface. Pay attention to any imperfections and fill them as necessary before moving to the next step.
7. Painting: Select a high-quality automotive paint that matches your classic car’s original color or your desired shade. Apply multiple thin layers with a spray gun, allowing adequate drying time between coats for optimal finish.
8. Clearcoat Application: After the final paint layer has dried, apply a clear coat. This step offers added protection and enhances the shine of your classic car’s new paint job.
9. Final Sanding and Polishing: Once the clear coat has cured, lightly sand with a very fine grit sandpaper. This will help eliminate any imperfections. Follow up with polishing compound to bring out a brilliant shine.
10. Inspect and Finish: Conduct a thorough inspection of the newly painted surface for any flaws. Touch up any areas needing attention. Once satisfied with the outcome, reassemble any parts removed during the restoration process.
By following this step-by-step guide, you will achieve professional-looking bodywork and a beautiful paint finish on your classic car, enhancing not only its aesthetic appeal but also its overall value.


