

Restoring a classic Mustang is a labor of love that requires careful attention to detail, especially when it comes to the painting process. Proper preparation is essential to achieve a stunning finish, ensuring that your car not only looks great but also stands the test of time.
Before diving into the actual painting, it’s crucial to consider the initial steps, including the application of primer. This foundational layer serves multiple purposes, such as improving adhesion and enhancing the overall durability of the paint. Selecting the right type of primer for your classic Mustang can make a significant difference in the outcome, so understanding the properties of various products is key.
In this guide, we will explore the essential techniques and materials needed to prepare your Mustang for its new coat of paint. From sanding the surface to selecting the right primer and finish, each step plays a vital role in achieving a professional-looking result. Whether you are a novice or an experienced restorer, these insights will help you navigate the painting process with confidence.
Choosing the Right Primer for Your Classic Mustang
When it comes to preparing your classic Mustang for a fresh coat of paint, selecting the right primer is crucial for achieving a durable and attractive finish. Primers serve as a foundation for the topcoat, promoting adhesion and enhancing the overall appearance of the car. To make an informed choice, consider the type of primer that best suits your project’s needs.
There are mainly two types of primers to choose from: epoxy and urethane. Epoxy primers offer excellent adhesion and corrosion resistance, making them a popular choice for classic car restorations. They create a solid base for higher-quality paint finishes and are especially effective on bare metal surfaces, where they provide a barrier against moisture and rust.
Urethane primers, on the other hand, are highly versatile and can be used on a variety of surfaces, including fiberglass and plastic. They have a faster drying time and can be sanded quickly, making them suitable for those looking to expedite the painting process. Their flexibility also allows for better paint compatibility, which is essential for achieving a seamless finish on your Mustang.
Another important aspect to consider is the color of the primer. Using a gray or white primer can help reflect the true color of your topcoat, while a darker primer may require additional coats of paint. Additionally, tinted primers designed to match your topcoat color can enhance the final appearance and provide better coverage.
Surface preparation is equally vital. Ensure that the surface is clean, free of grease, and sanded properly before applying the primer. This will help promote adhesion and prevent issues such as peeling or flaking paint down the road.
Lastly, always follow the manufacturer’s instructions regarding application techniques and drying times. This helps ensure that your primer cures properly and provides the best possible base for your classic Mustang’s finish. By taking the time to choose the right primer and prepare your car correctly, you’ll set the stage for a stunning paint job that lasts for years to come.
Step-by-Step Process for Painting Your Classic Mustang
Painting your classic Mustang requires a carefully planned approach to achieve a professional finish. Follow these steps to ensure an outstanding result.
1. Preparation and Planning
Start by choosing the right location for your project. A well-ventilated, dust-free space is ideal. Gather all necessary materials, including sandpaper, primer, paint, clear coat, and protective gear. Take the time to decide on the color and finish you want for your car.
2. Disassemble and Clean
Remove all trim pieces, hardware, and any detachable parts to prevent overspray. Thoroughly wash your Mustang to remove dirt and grease. A clean surface is crucial for paint adherence.
3. Sanding the Surface
Use sandpaper to smooth the surface of the car, removing old paint and imperfections. Start with a coarser grit to eliminate any rust or scratches, then progress to a finer grit for a smooth finish. Ensure all areas are even and well-prepared.
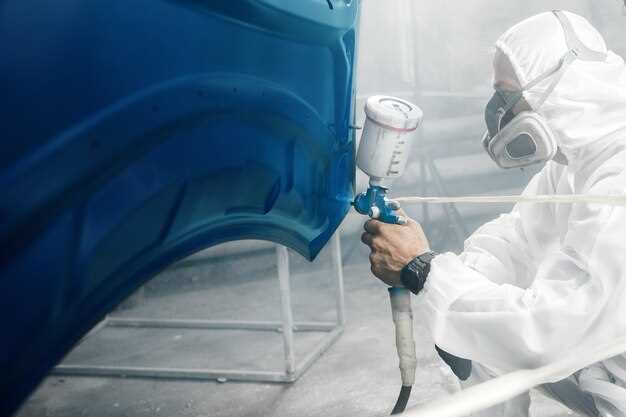
4. Applying Primer
After sanding, apply a high-quality primer to the car’s surface. This step is essential for promoting adhesion and ensuring a uniform finish. Allow the primer to dry completely, following the manufacturer’s instructions.
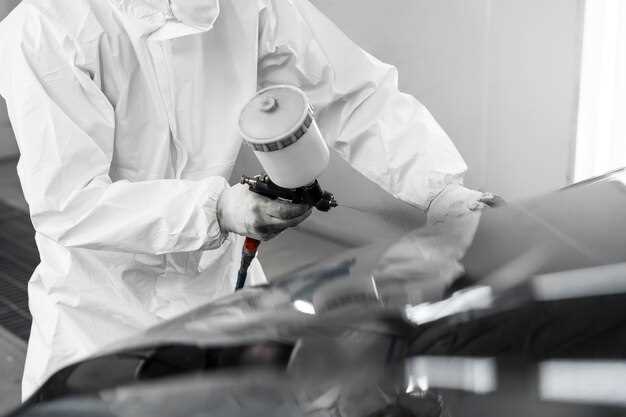
5. Painting the Car
Once the primer is dry, it’s time to paint your Mustang. Use a spray gun for an even application, maintaining a consistent distance from the surface. Apply multiple thin coats instead of a single thick layer to prevent runs and drips. Allow each coat to dry before applying the next.
6. Clear Coating
After the final coat of paint has dried, apply a clear coat to protect the paint and provide depth. This layer enhances the finish and dramatically increases the durability of the paint job. Ensure adequate drying time between coats.
7. Final Touches
Once the clear coat is fully cured, carefully reassemble all parts of the car. Inspect for any imperfections, such as dust particles or uneven areas. Use polishing compounds to correct minor flaws and achieve a brilliant shine.
8. Curing and Maintenance
Allow the paint to cure fully before exposing the vehicle to any harsh conditions. Follow recommended maintenance practices to preserve the new finish, including regular washing and waxing to protect the paint.
Finishing Touches: Polishing and Protecting Your Paint Job
After applying a high-quality primer and ensuring a smooth base for your classic Mustang, the finishing touches play a crucial role in achieving a professional look. Polishing is essential to enhance the depth and clarity of the paint, making your car shine like new.
Start by using a fine-cut polishing compound. Apply it using a dual-action polisher or a soft cloth, working in small sections. The goal is to eliminate any imperfections on the surface, such as swirl marks or light scratches. Always follow the manufacturer’s recommendations for the product you are using, and be careful not to polish through the clear coat.
Once the surface is polished to your satisfaction, the next step is to protect your paint job. This can be done using a high-quality wax or a paint sealant. Wax creates a protective barrier against UV rays, dirt, and contaminants, while sealants tend to provide longer-lasting protection. Apply the product evenly, allowing it to cure according to the instructions. Buff it out with a soft microfiber cloth for a brilliant finish.
Regular maintenance is important to keep your classic Mustang looking pristine. Wash the car frequently with a gentle car soap and always dry it with a microfiber towel to prevent water spots. Consider reapplying the wax or sealant every few months to ensure ongoing protection for your paint job.
By focusing on these finishing touches, you can ensure that the investment in your classic Mustang’s paint job not only looks stunning but also stands the test of time.


