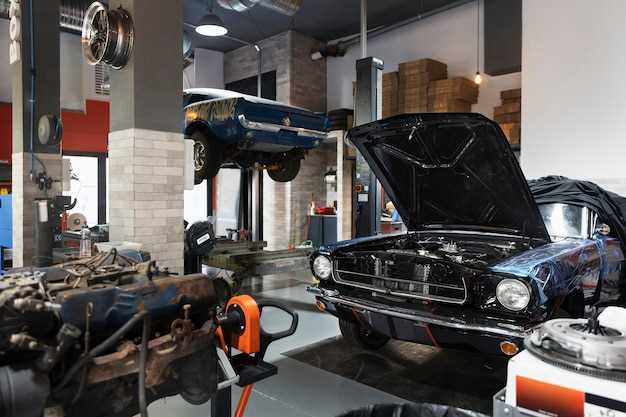

Restoring a classic Mustang is a dream for many automotive enthusiasts, but the costs can quickly add up. However, with careful planning and some DIY strategies, you can achieve a stunning restoration without breaking the bank. By focusing on budget-friendly approaches, you can enjoy the process of breathing new life into your vintage vehicle while keeping your finances in check.
To start your restoration journey, it’s essential to build a detailed plan that outlines your goals and budget. Assess the condition of your Mustang and prioritize the areas that require immediate attention. This methodical approach allows you to allocate resources where they are most needed and prevents overspending on unnecessary parts or upgrades.
One of the most effective ways to save money during the restoration process is to embrace the DIY spirit. Many tasks, such as sanding, painting, or even engine work, can be accomplished with the right tools and a bit of research. Online forums, tutorials, and local car clubs can provide valuable insights and support as you take on various projects, ensuring that you develop new skills while keeping costs low. Remember, each step you take not only enhances your Mustang but also deepens your connection to this iconic vehicle.
Choosing Affordable Parts Without Sacrificing Quality

When restoring a Mustang on a budget, finding the right parts can be a challenging yet rewarding process. It’s crucial to strike a balance between affordability and quality to ensure your restoration not only meets your budget but also stands the test of time.
One of the first steps in sourcing affordable parts is to research reputable aftermarket suppliers. Many companies specialize in Mustang parts and offer a range of options from OEM replacements to high-quality aftermarket alternatives. Reading reviews and seeking recommendations in online forums can help you identify trustworthy brands that provide good quality without the hefty price tag.
Additionally, consider exploring second-hand parts. Local auto salvage yards or online marketplaces can be treasure troves of affordable components. Just ensure that you conduct a thorough inspection of any used parts for wear and damage. In many cases, used components can be refurbished through DIY methods, making them even more budget-friendly while maintaining functionality.
Group-buying or participating in Mustang enthusiast communities can also yield significant savings. Some clubs or groups organize bulk purchases that reduce costs on specific parts. This not only makes restoration more economical but also fosters a sense of community among Mustang lovers.
Another strategy is to prioritize essential parts that directly impact performance and safety, such as brakes and suspension components, while opting for more cost-effective options for non-critical areas. This approach allows you to invest your budget wisely without compromising the integrity of your restoration project.
Finally, don’t overlook the possibility of refurbishing or rebuilding old parts. Many components, like starters or fuel pumps, can be repaired DIY-style, often saving a significant amount of money while ensuring the quality remains intact. With patience and the right guidance, tackling these projects can be a satisfying and economical way to restore your Mustang.
Step-by-Step Guide to DIY Bodywork for Beginners
Restoring a Mustang on a budget can be an exciting and rewarding project, especially when it comes to DIY bodywork. Here’s a straightforward guide to help you get started.
Step 1: Gather Your Tools and Materials
Before diving in, secure all necessary tools and materials. You will need:
– Sandpaper (various grits)
– Body filler
– Primer
– Paint that matches your Mustang’s original color
– Paint spray gun or aerosol cans
– Masking tape and paper
– Protective gear (gloves, mask, goggles)
Step 2: Assess the Damage
Inspect the body for dents, rust, and any paint imperfections. Take note of all areas that require attention. This assessment will guide your process and budget allocation.
Step 3: Prepare the Surface
Using sandpaper, gently sand the damaged areas to remove rust and old paint. Start with rough grit and finish with finer grit to create a smooth surface. Ensure to wipe away any dust with a clean cloth.
Step 4: Apply Body Filler
Mix the body filler according to the instructions. Apply it to the damaged spots using a putty knife. Smooth it out as much as possible to minimize sanding later. Allow it to cure completely.
Step 5: Sand the Body Filler
Once the filler is dry, sand it down until it’s flush with the surrounding area. Use finer grits for a smoother finish. This step is crucial for a polished look.
Step 6: Cleaning and Masking
Clean the area to remove any dust from sanding. Use masking tape and paper to cover surrounding areas to avoid overspray during painting.
Step 7: Prime the Area
Apply a coat of primer to the repaired area. This step improves paint adhesion and provides a uniform base color. Allow the primer to dry according to the manufacturer’s guidelines.
Step 8: Paint Your Mustang
Once the primer is dry, apply the paint evenly to the primed areas. Start with thin coats, allowing each coat to dry before adding another. This technique helps achieve a better finish and reduces drips.
Step 9: Clear Coat and Finish
After the paint has dried, apply a clear coat to protect the paint job and enhance the shine. Follow the drying time recommended by the product.
Step 10: Final Touches
Remove any masking tape and paper carefully. Inspect your work for any imperfections and touch them up as needed. Finally, give your Mustang a good wash and enjoy the fruits of your labor!
By following this DIY bodywork guide, you can effectively restore your Mustang without breaking the bank. With patience and practice, you will develop the skills needed for more advanced projects in the future.
Cost-Effective Upgrades to Enhance Performance

Restoring a Mustang on a budget doesn’t mean sacrificing power or performance. There are several cost-effective upgrades that can significantly enhance your vehicle’s capabilities without breaking the bank.
One of the most impactful upgrades is replacing the air filter with a high-flow option. A DIY installation is straightforward and can improve engine breathing efficiency, leading to noticeable gains in horsepower and torque. Look for budget-friendly brands that offer a good balance between cost and performance.
Next, consider upgrading the exhaust system. A cat-back exhaust not only provides a performance boost but also gives your Mustang a more aggressive sound. Many options are available at various price points, and with a bit of DIY effort, installation can be completed in a few hours, making it a smart choice for improving exhaust flow and overall engine performance.
Another area to focus on is the ignition system. Upgrading to high-performance spark plugs and ignition wires can enhance combustion efficiency, improving throttle response and fuel economy. This is a relatively inexpensive upgrade that can easily be tackled as a DIY project.
If you’re looking for improved handling, consider investing in a set of budget coil spring spacers or sway bar end links. These components can enhance stability in corners and reduce body roll without requiring extensive modifications or large sums of money.
Lastly, don’t overlook the importance of maintaining proper tire pressure and alignment. Ensuring your Mustang is optimally aligned and using appropriate tire pressures can significantly improve performance, longevity, and fuel efficiency on a tight budget.
By focusing on these cost-effective upgrades, you can enhance your Mustang’s performance while keeping your budget intact. A combination of DIY projects and smart purchasing decisions can lead to a revitalized driving experience without unnecessary expenses.


